Cert Camel
Guides / Install
Install
Fifteen minutes to watching certificates. Longer if you want renewal, because that needs an API token from your DNS provider.
1. What you need
- Windows with PowerShell 5.1 — that ships with Windows, there is nothing to install.
- For renewal: an API token for whoever hosts your DNS. Cloudflare, DNS Made Easy and NS1 are wired up; around a hundred more are available through Posh-ACME.
- For deployment: HAProxy 2.2 or newer with the Data Plane API enabled.
Watching certificates needs none of that — only the folder and a list of hostnames.
2. Get the folder onto the machine
Two ways, and they end with the same folder. The difference is only what happens later, when there is a new version.
Download the release
A .zip of the whole folder. Nothing to install, and you do not
need git. Check for updates in Settings will tell you when a
newer release exists, and you download that one the same way.
Or clone it
Needs git for Windows. This is not an installer either — it downloads the same folder, plus the bookkeeping that lets Cert Camel update itself: with a clone, Check for updates pulls the new version in place rather than telling you to go and fetch it.
git clone https://github.com/Isaiah63/CertCamel.git C:\CertCamelA clone also skips the unblock step below, because the files never came through a browser.
Extract it somewhere sensible — C:\CertCamel is fine. Then, and
this catches everyone:
Windows marks files that came from the internet, and PowerShell will refuse to run them. Right-click the archive → Properties → tick Unblock → OK, then extract. If you have already extracted it:
Get-ChildItem -Recurse C:\CertCamel | Unblock-FileIt stores unencrypted private certificate keys. A synced folder copies them to somebody else's servers. (Your API credentials are encrypted with Windows DPAPI — it is the certificate keys that are exposed here.) See Security.
3. Run First Time Setup
Double-click First Time Setup.bat. It creates your domain list, offers to fetch the ACME client into the folder, runs a first check, and offers to register the scheduled tasks.
Registering a task that runs while nobody is signed in needs the Log on as a batch job right, which a standard user does not hold. Without elevation setup still works, but the tasks fall back to running only while you are signed in — and it tells you so.
On a workstation you use daily that is fine. On an always-on server it is not: renewal would never fire, Task Scheduler would still show the task as healthy, and the first symptom would be an expired certificate. To check an existing install:
Get-ScheduledTask -TaskName "Cert Camel Renew" | Select-Object -Expand PrincipalS4U runs unattended. Interactive does not — re-run
setup as administrator to fix it, or run
.\setup.ps1 -RepairTasks from an elevated prompt.
4. Add your domains
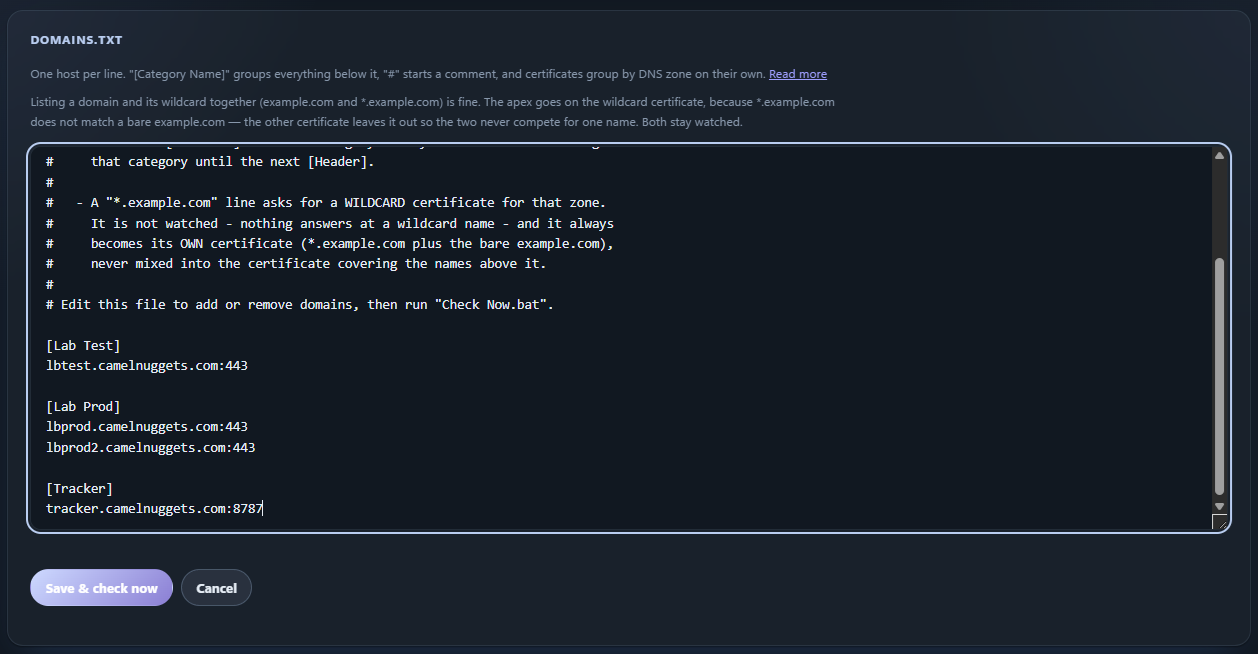
Open the page with Open Tracker.bat — always that, never the HTML file directly, because the page needs the small local server behind it. Then Certificates → Edit domains. One host per line:
[Production]
www.example.com
shop.example.com

[Internal]
vpn.example.com:8443
*.example.com
Bracketed lines are just grouping. A *.example.com line asks
for a wildcard, which always becomes its own certificate. Certificates are
grouped by DNS zone, so a new hostname joins the right one by itself.
5. Connect your DNS provider
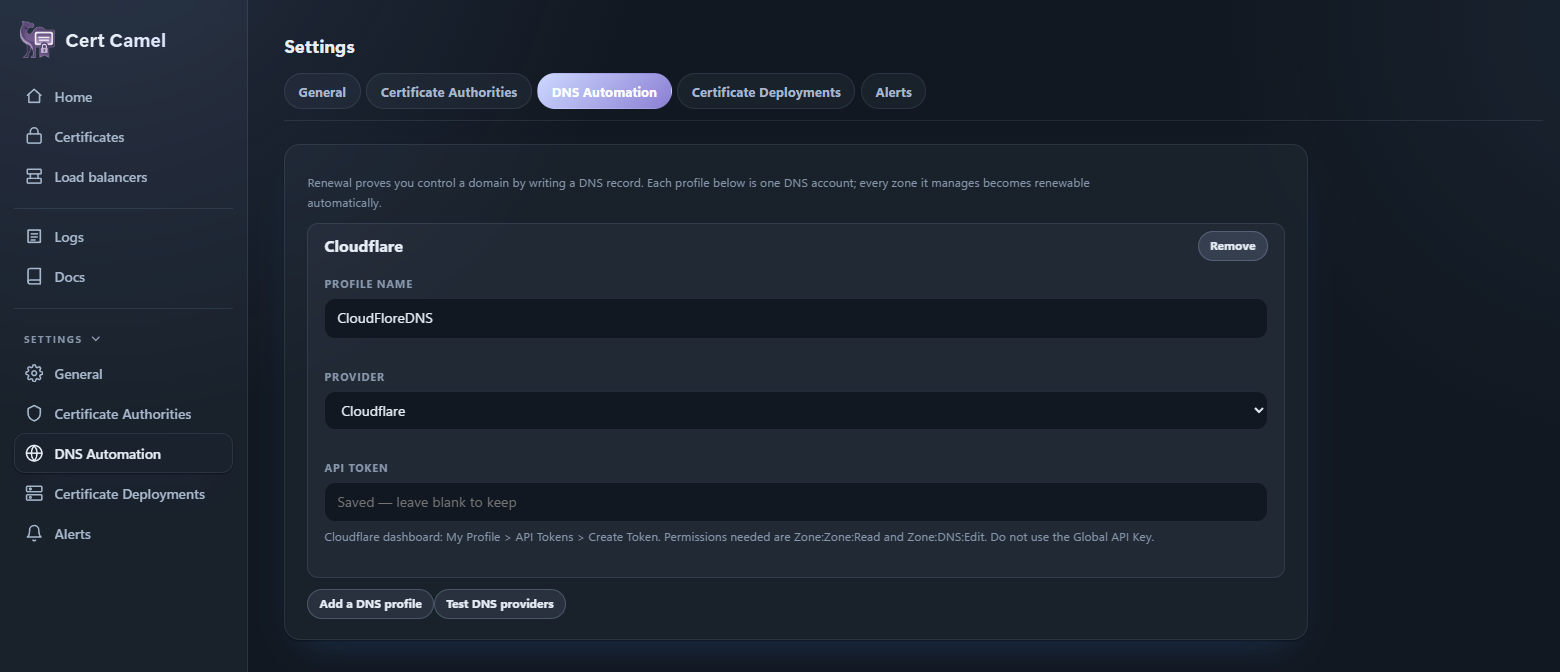
Settings → DNS Automation → add a profile and paste your
API token. For Cloudflare the token needs Zone:Zone:Read and
Zone:DNS:Edit — not the Global API Key.
Press Test DNS providers. It writes a real challenge record and deletes it again, rather than only listing zones — a token with read but not write sails through a read-only check and then dies halfway through a renewal, after an order has already been created.
6. Try it against staging first
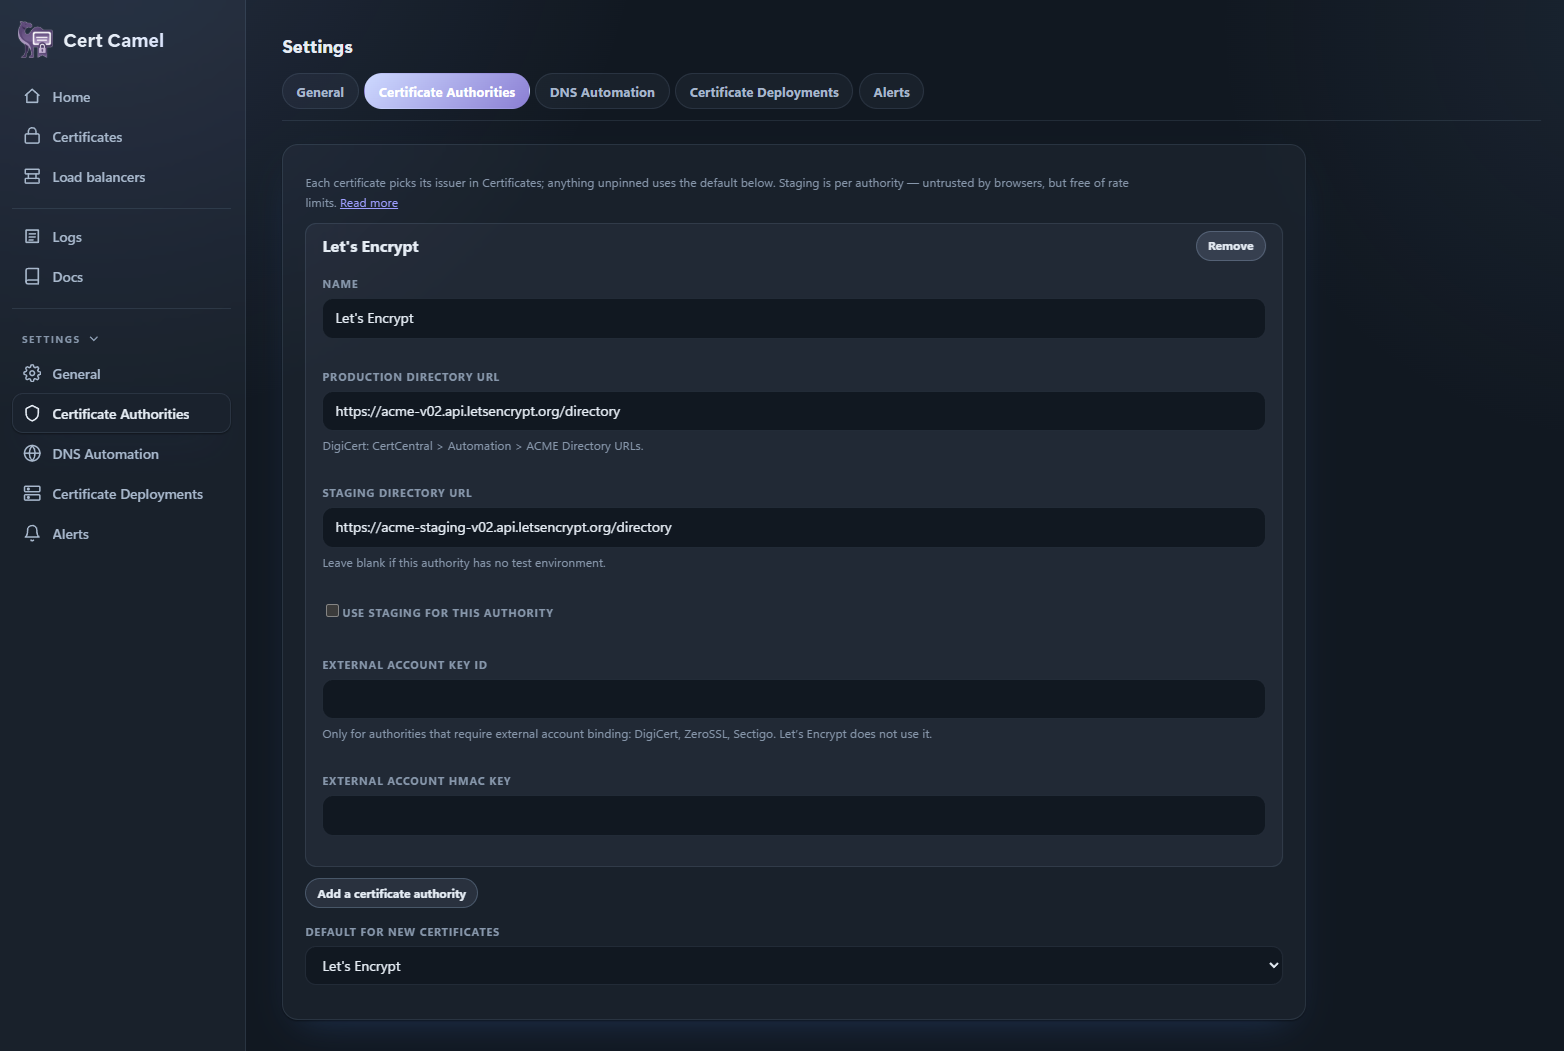
Settings → Certificate Authorities → tick Use staging for this authority. Staging certificates are not trusted by browsers, but they do not count against rate limits — so you can get it wrong as many times as you need to.
Renew one certificate. When it completes cleanly, untick staging and renew again for the real thing.
7. Optional: deploy to HAProxy
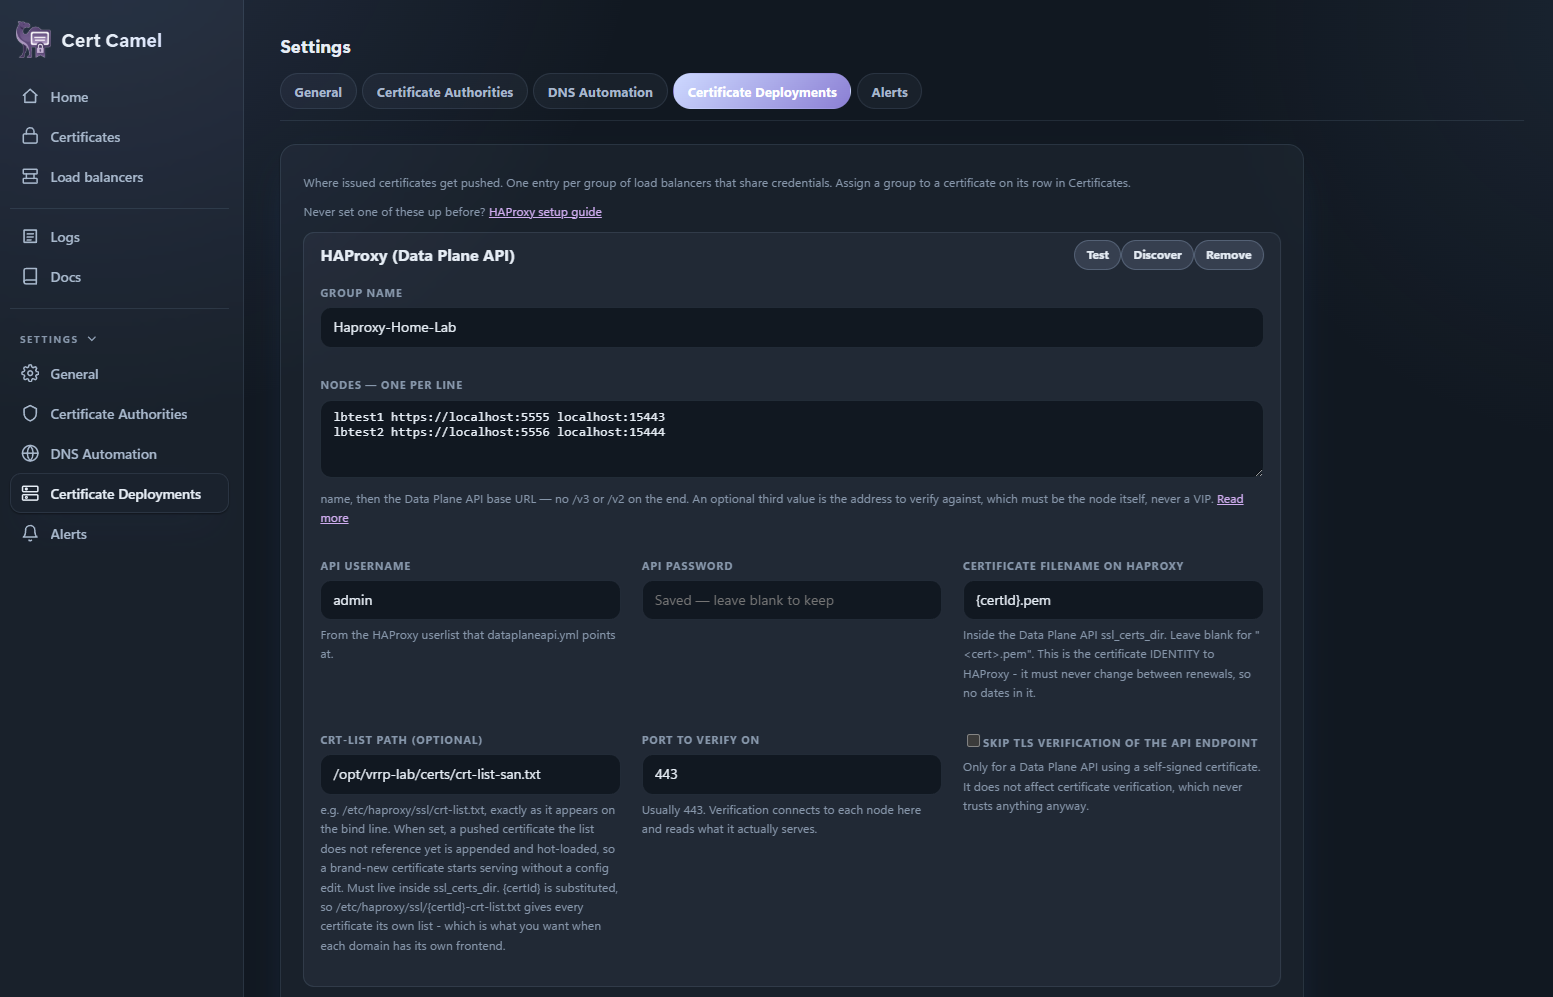
Settings → Certificate Deployments → add a group, then press Discover and it will ask your nodes which frontends terminate TLS and fill in the details from what they report. The HAProxy setup guide covers the one-time configuration change on the HAProxy side.
8. Optional: keep it running on a server
Run setup as administrator on a Windows Server and it offers to start the
page at boot, so it survives sign-out and reboots. It stays on
127.0.0.1 — reachable from that machine over RDP, exposed to
nothing.
Is it actually working?
- The Home page shows an Automation Scripts tile listing each task and when it runs.
- Automated renewals scheduled shows the date and time each certificate is next due, from the CA's own renewal window.
- The Logs page has an audit trail. A line with source
taskrather thanuiis proof the unattended path is working.
A nightly run that finds nothing due still records that it ran, so a quiet log means "nothing needed doing" rather than "the scheduler stopped".